
It’s state fair time again! And that means food competitions among teams at my husband’s work. I was volunteered for one of the categories, and no, I don’t work there. Funny how things like that happen! I haven’t been feeling the greatest this past week and have been severely lacking creativity. Not that I’m all that creative when I am feeling well. . .
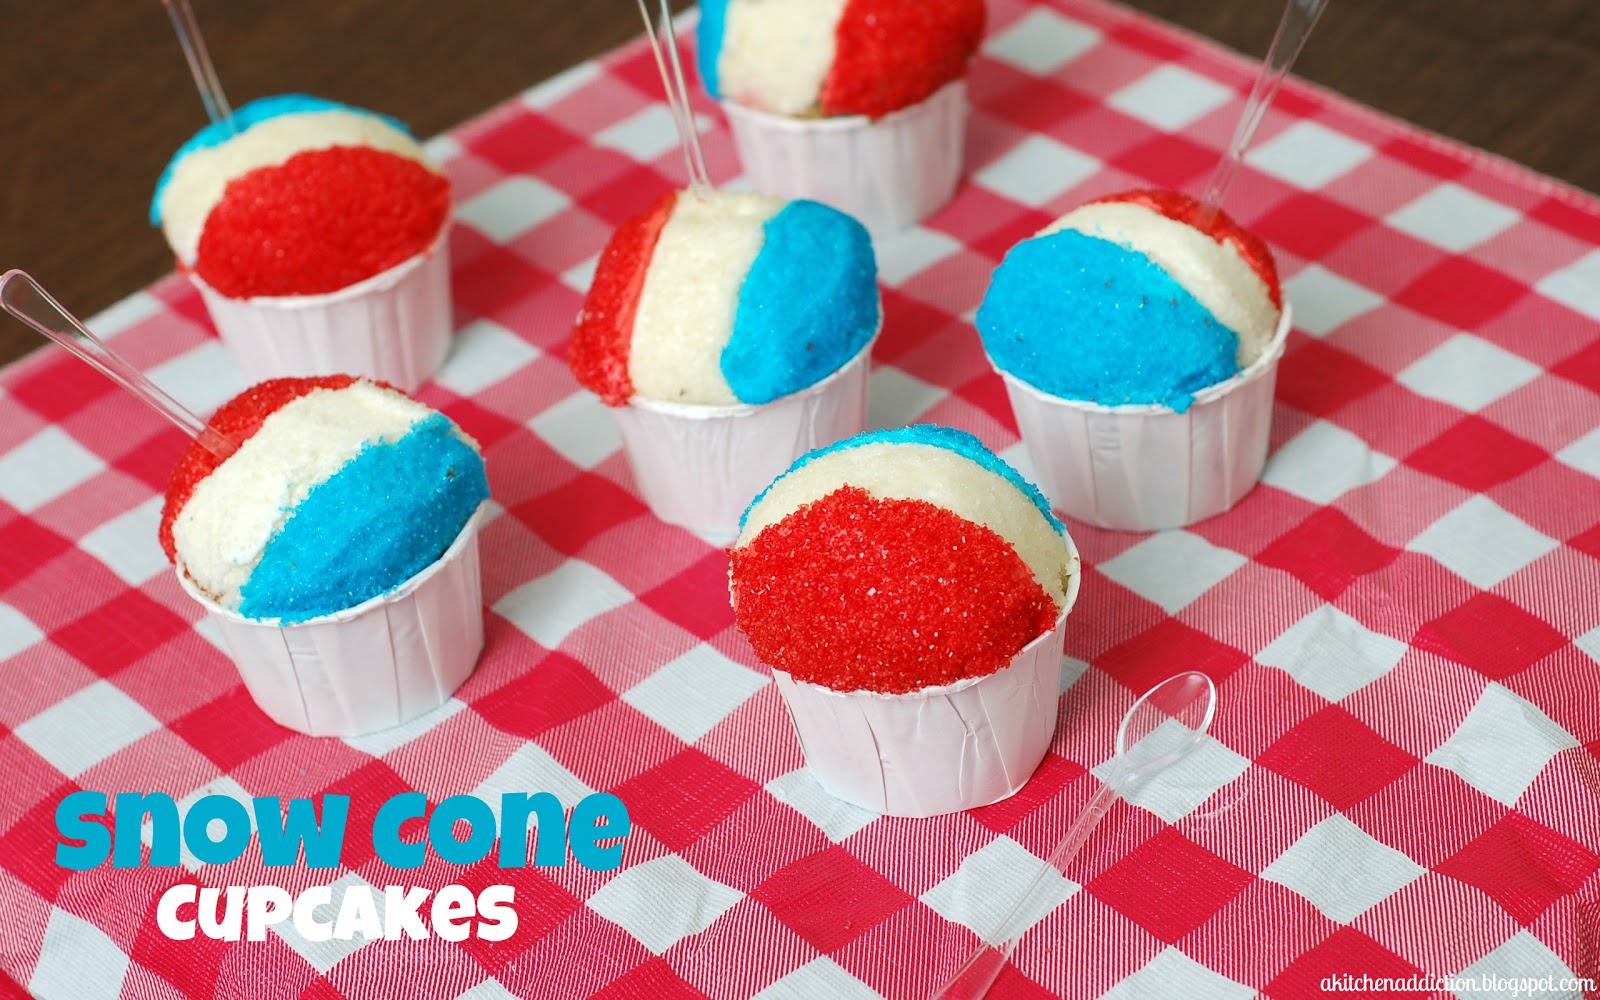
Needing some inspiration, I browsed through Bakerella. Have you seen her site? Because, if you haven’t, you really should go check it out! She doesn’t have problems with creativity! On her site I found these snow cone cupcakes, and they fit the category I was given perfectly.

So guess what I was doing yesterday?? Since I know that you are dying to know, I’ll tell you! 😉 I was making dozens of these cupcakes and frosting them and putting sprinkles on them! Though, I must give credit where credit is due, my husband jumped in and helped with the frosting last night. Isn’t he great?! 🙂

If you want step by step instructions with pictures, go check out the post on Bakerella. She does a much better job than I could have done! I just used a doctored up cake mix instead of from scratch. I know, I’m a slacker.
Snow Cone Cupcakes
Decorating Idea and Frosting from Bakerella
Yield: 12 cupcakes
Ingredients
- For the Cupcakes
- 1 (18.25 oz) white cake mix
- 1 (3.4 oz) vanilla pudding mix
- 1 C sour cream
- 3/4 C oil
- 4 eggs, lightly beaten
- 2 tsp vanilla extract
- For the Frosting
- 1 C butter, softened
- 4 C confectioner’s sugar, sifted
- 2 tsp vanilla extract
- 2 tbsp milk
- food coloring
- red, white, and blue sugar crystals
- mini spoons
- Preheat oven to 350. Line muffin tin with liners.
- In a bowl of a stand mixer or using a hand mixer, beat together cake mix and pudding mix. Add in the sour cream, oil, eggs, and vanilla. Beat until well-combined.
- Divide batter evenly into three bowls. Tint one bowl red and one blue. Spoon batter into decorating bags and tie off the end of the bags with twist ties or rubber bands. Lay the bags side by side in the desired order of coloring and tape around the bottom of the bags. This will help you handle the bags when piping the batter. (I found that my decorating bags had a slippery coating and only duct tape worked.)
- Cut the tips of the bags off and pipe batter into liners in a back and forth motion. Fill the cups about 2/3 full. Bake for 15-20 minutes or until toothpick inserted in the center of the cupcake comes out clean. Remove from oven and allow to cool completely.
- While cupcakes are cooling, start working on the frosting. Beat together butter and vanilla. Slowly add in confectioner’s sugar until well-combined. Add in milk until you reach your desired consistency and beat until creamy.
- Divide frosting into three bowls. Color one blue and one red. With a knife or decorating bag, make a white strip down the middle. Make sure to round the frosting from one edge of the cupcake to the other to give it the rounded look of a snow cone. Sprinkle with white sugar crystals. Repeat with red and blue frosting and sugar crystals.
- Serve with mini spoons.
Dorothy @ Crazy for Crust
Sunday 19th of August 2012
Those are super gorgeous!
Winnie
Saturday 11th of August 2012
These are AWESOMEVery cute and colorful
ITheeCook
Friday 10th of August 2012
Oh cute! My kids would love these.
Zachary and Sarah @ HHG
Friday 10th of August 2012
Oh my goodness, look at how adorable those are!! I absolutely love them! Nice work, Jessica :) P.S. I've been meaning to tell you that I LOVE your blog name! It'll pop into my head sometimes and I think, "Man, that is so clever!" Haha Just thought you should know :)
Tanya-Lemonsforlulu.com
Friday 10th of August 2012
These turned out perfectly!!!! I love the idea of a snow cone cupcake, mainly because I don't like snow cones, but love cupcakes!!! I want to make these before summer is over!